Dummies Guide to Thunderbolt Clusters
It’s me, I’m the dummy
Introduction
This week I got a few new Mac’s to test out MLX since it’s the new craze and running Kimi K2 at home (and within ~20k) is extremely enticing. So here I am, getting all the Mac’s setup, everything is going fairly smoothly.
Then I need to figure out how to do multi-node communication via Thunderbolt 5 (up to 120Gb/s one way). Super fast, so fast that latency from those communications during big model inferencing should be near zero, right?
Apparently it’s a hair more involved though than just “plug the Thunderbolt cable in and they work”
So this blog will be a short, fast guide on how you can very quickly and easily setup the right router configuration in the Mac’s so they can talk to each other.
Solving the problems
Step 1 would be of course to make sure you have both Mac’s hooked up via thunderbolt cable. (TB5 if you want to max out the M3 Ultra).
Next comes the… fun parts.
Essentially we need to configure a network to exist between Mac A (Balthasar) and Mac B (Melchior).
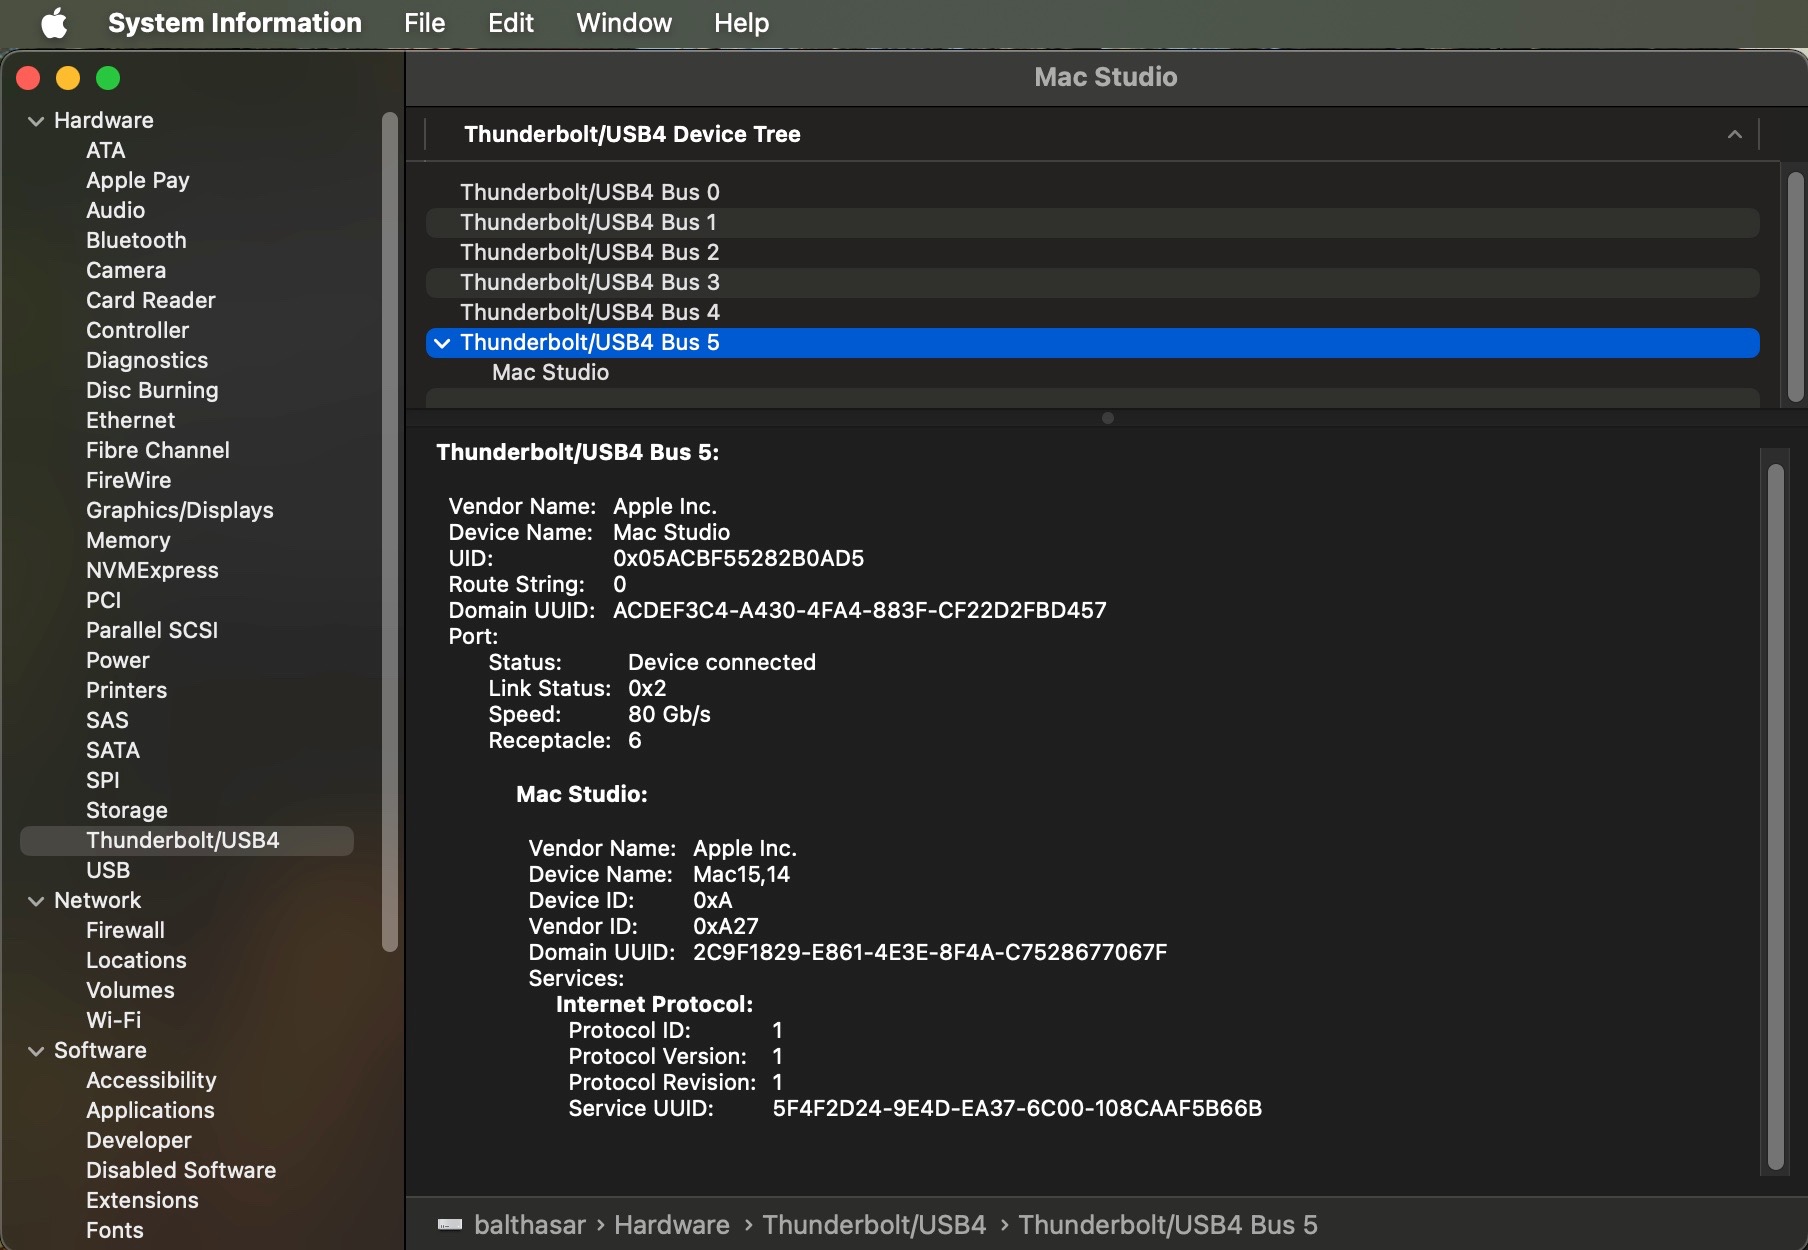
First, verify that your other Mac shows up properly. Go into System Information -> Hardware -> Thunderbolt/USB4.
What you should see is the other Mac you have hooked up, such as the below picture:
Once that’s setup properly, you’re going to go into Network -> Thunderbolt Bridge.
We will configure in TCP/IP to have Configure IPv4 set to Manually.
Then set the IP address to some generic subnet. In my case I chose 10.0.0.1 for Melchior and 10.0.0.2 for Balthasar. These routes are how you will direct traffic specifically through the Thunderbolt interface.

After these are configured, you can restart your Mac’s and try pinging to each other’s 10.x.x.x IPs and you should be working now!
Seems simple very sysadmin, as it is, however it’s been ~8 years since I took a sysadmin class so hopefully this will help someone, even if it’s just me awhile from now who tries to break their Mac’s again.